Pavers are a popular choice for driveways, patios, and walkways due to their aesthetic appeal and durability. However, like any outdoor surface, they are not immune to damage. Understanding the common causes of paver damage is essential for effective paver maintenance and repair. Factors such as weather conditions, improper installation, and heavy traffic can lead to various types of damage that may compromise the integrity of your pavers. One of the most prevalent causes of paver damage is the natural elements.
Extreme temperatures, heavy rainfall, and freeze-thaw cycles can cause pavers to crack or shift. Additionally, tree roots can exert pressure on pavers, leading to uneven surfaces or even complete dislodgment. Another significant factor is poor drainage; when water accumulates beneath the pavers, it can erode the base material and result in sinking or cracking. There are several types of paver damage that homeowners should be aware of. Cracking is often the most visible issue, which can occur due to stress from heavy loads or temperature fluctuations.
Other types include chipping, where small pieces break off the edges, and discoloration caused by mold or mildew growth. Understanding these issues not only helps in identifying problems early but also aids in implementing appropriate maintenance strategies to prolong the life of your pavers.
Assessing the Extent of Damage
Before embarking on any paver maintenance efforts, it is crucial to assess the extent of damage to your pavers. This evaluation will help you determine the appropriate repair methods and materials needed to restore their condition.Signs of Paver Damage
- Cracks: Look for visible cracks in the surface of the pavers. These can range from small hairline fractures to larger, more significant breaks.
- Displacement: Check if any pavers are uneven or have shifted out of place.
This can create tripping hazards and may indicate underlying issues.
- Weeds: The presence of weeds growing between pavers can signal that the joints are compromised, allowing soil to seep through.
- Stains: Oil, rust, or other stains can not only detract from the appearance but may also indicate deeper issues with the paver material.
- Surface Erosion: If you notice a rough texture or crumbling edges, this could be a sign of erosion due to weather exposure or poor installation.
Evaluating Paver Condition
To effectively evaluate the condition of your pavers, follow these steps:
- Visual Inspection: Conduct a thorough visual inspection of your paved area. Take note of any visible damage and make a list for reference.
- Tactile Assessment: Run your hand over the surface of the pavers. Feel for any irregularities or loose pieces that may need attention.
- Check for Movement: Gently press down on individual pavers to see if they shift or wobble. This can indicate that they are not properly set.
- Water Drainage: Observe how water drains off your paved area after rain.
Poor drainage can lead to further damage over time.
Tools and Materials Needed for Paver Repair
When it comes to paver maintenance, having the right tools and materials is crucial for effectively repairing cracked or damaged pavers. Below is a comprehensive list of essential items you will need to ensure a successful repair process.- Paver Repair Tools:
- Rubber Mallet: This tool is essential for gently tapping pavers back into place without causing further damage.
- Chisel and Hammer: Use these for removing any broken pieces of pavers or for adjusting the fit of existing ones.
- Trowel: A trowel is useful for applying repair materials and smoothing out surfaces.
- Level: Ensuring that your pavers are level is key to preventing future issues, so a level tool is necessary.
- Materials for Repairing Pavers:
- Paver Sand: This is used to fill in gaps between pavers and provide stability.
- Concrete Adhesive: For more severe cracks, a strong adhesive can help bond broken pieces together.
- Polymeric Jointing Sand: This type of sand hardens when wet, helping to lock pavers in place and prevent weed growth.
Step-by-Step Guide to Repairing Cracked Pavers
Repairing cracked pavers is essential for maintaining the aesthetic appeal and structural integrity of your outdoor spaces.Follow this step-by-step guide to effectively address any damage.
- Assess the Damage: Begin by examining the extent of the cracks. Small hairline cracks may only require filling, while larger cracks or broken pavers may need replacement.
- Gather Your Materials: For filling cracks, you will need a polymer-modified sand or a suitable crack filler. If replacing pavers, ensure you have matching pavers on hand, along with a rubber mallet, trowel, and jointing sand.
- Clean the Area: Remove any debris, dirt, or vegetation from the cracked area using a broom or pressure washer. This ensures that the filler adheres properly.
- Fill the Cracks: For small cracks, use a trowel to apply the polymer-modified sand or crack filler into the crack.
Make sure to pack it tightly and smooth it out to match the surrounding surface.
- Replace Damaged Pavers: If a paver is too damaged to repair, carefully remove it by lifting it with a pry bar. Clean the base and place a new paver in its spot. Use a rubber mallet to tap it down gently until it is level with adjacent pavers.
- Seal the Pavers: Once repairs are complete, consider applying a sealant to protect your pavers from future damage. This will help prevent water infiltration and reduce wear from UV exposure.
Preventive Measures for Paver Maintenance
Maintaining your pavers is essential for ensuring their longevity and aesthetic appeal.By implementing a few preventive measures, homeowners can significantly reduce the risk of damage and the need for extensive repairs.
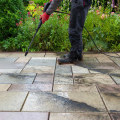
- Regular Cleaning: Keeping your pavers clean is the first step in paver maintenance. Use a broom or a leaf blower to remove debris, leaves, and dirt. For stubborn stains, a pressure washer can be effective, but be cautious not to use too much pressure, as it may damage the surface.
- Sealing: Applying a high-quality sealant every few years can protect your pavers from moisture, stains, and UV damage. This barrier helps prevent weeds from growing between the pavers and reduces the risk of cracking.
- Weed Control: Weeds can not only mar the appearance of your pavers but also compromise their structural integrity.
Regularly inspect the joints between pavers and remove any weeds promptly. Consider using a weed barrier fabric during installation to minimize future growth.
- Proper Drainage: Ensure that water drains away from your paver surfaces. Poor drainage can lead to pooling water, which may cause erosion or cracking over time. Installing drainage systems or grading the area can help manage water flow effectively.
- Avoid Heavy Loads: Be mindful of the weight placed on your pavers.
Heavy vehicles or equipment can lead to cracks and shifting. If you anticipate heavy usage, consider reinforcing the base layer during installation.
Common FAQs About Paver Repair and Maintenance
When it comes to paver maintenance, many homeowners have questions about how to effectively repair and maintain their outdoor surfaces. Here are some common FAQs that can help you navigate paver repair.What should I do if my pavers are cracked?
If you notice cracks in your pavers, the first step is to assess the extent of the damage.For minor cracks, you can use a concrete filler or epoxy specifically designed for pavers. Clean the area thoroughly before applying the filler, and ensure it is level with the surrounding surface. For larger cracks or significant damage, it may be necessary to replace the affected pavers entirely.
How can I prevent weeds from growing between my pavers?
Weeds can be a persistent issue in paver maintenance. To prevent them from taking root, consider applying a polymeric sand between the joints of your pavers.This type of sand hardens when wet, creating a barrier that inhibits weed growth. Regularly sweeping and cleaning the joints will also help keep weeds at bay.
What is the best way to clean my pavers?
Cleaning your pavers is essential for maintaining their appearance and longevity. Start by sweeping away debris and dirt. For deeper cleaning, use a pressure washer on a low setting to avoid damaging the surface.You can also use a mixture of water and mild detergent for stubborn stains. Always rinse thoroughly after cleaning.
How often should I seal my pavers?
Sealing your pavers is an important part of paver maintenance. It is generally recommended to seal them every 1-3 years, depending on your climate and usage. Sealing helps protect against stains, moisture, and UV damage, extending the life of your pavers.What should I do if my pavers are sinking?
Sinking pavers can indicate underlying issues with the base material.To address this, you may need to lift the affected pavers and add more base material or sand underneath. After leveling, replace the pavers and compact the area to ensure stability.By addressing these common questions about paver repair and maintenance, you can keep your outdoor spaces looking great and functioning well for years to come.
Conclusion: Key Takeaways on Paver Maintenance and Repair
In conclusion, effective paver maintenance is essential for preserving the aesthetic appeal and structural integrity of your outdoor spaces. Throughout this article, we have explored various aspects of assessing and repairing cracked or damaged pavers, emphasizing the importance of timely intervention. First and foremost, a thorough assessment of your pavers is crucial. Regular inspections can help identify minor issues before they escalate into major problems.Look for signs of wear, such as cracks, uneven surfaces, or shifting pavers. Addressing these issues promptly can save you time and money in the long run. When it comes to repair techniques, several options are available depending on the extent of the damage:
- Minor Cracks: For small cracks, a simple filler or sealant can be applied to restore the surface.
- Loose Pavers: Replacing or resetting loose pavers can prevent further damage and maintain a uniform appearance.
- Major Damage: In cases of significant damage, it may be necessary to remove and replace entire sections of pavers.
By following these key takeaways, you can effectively manage your paver surfaces and enjoy their benefits without the worry of extensive repairs.