Paver maintenance is an essential aspect of home and landscape care that often goes overlooked. These versatile stones not only enhance the aesthetic appeal of your outdoor spaces but also provide functional benefits, such as improved drainage and stability. However, without proper care, pavers can become stained, cracked, or overrun with weeds, diminishing their beauty and functionality. Understanding the importance of paver maintenance is crucial for homeowners looking to preserve their investment and ensure their outdoor areas remain inviting. Maintaining pavers offers numerous benefits that extend beyond mere appearance.
Regular upkeep can prevent costly repairs down the line, as minor issues can escalate into significant problems if left unaddressed. Additionally, well-maintained pavers contribute to a safer environment by reducing the risk of slips and falls caused by uneven surfaces or moss growth. By investing time in paver care, you not only enhance the longevity of your hardscaping but also increase your property’s overall value. In this article, we will explore various DIY tips for maintaining pavers on a budget, ensuring that you can keep your outdoor spaces looking pristine without breaking the bank. From simple cleaning techniques to effective sealing methods, these strategies will empower you to take control of your paver maintenance and enjoy the many benefits that come with it.
Common Issues with Pavers
Pavers are a popular choice for driveways, patios, and walkways due to their durability and aesthetic appeal.However, like any outdoor surface, they can encounter a variety of common issues that require attention. Understanding these problems is essential for effective paver maintenance.
- Cracks: Over time, pavers can develop cracks due to shifting soil, freeze-thaw cycles, or heavy loads. These cracks not only detract from the appearance but can also lead to further damage if not addressed promptly.
- Weeds: One of the most common paver problems is the growth of weeds in the joints between pavers. Weeds can undermine the stability of the pavers and create an unsightly appearance.
Regularly inspecting and removing weeds is crucial.
- Shifting: Pavers may shift or settle unevenly due to poor installation or ground movement. This can create tripping hazards and affect drainage. Identifying shifting early allows for timely adjustments before more extensive repairs are needed.
- Stains: Oil, rust, and other stains can mar the surface of pavers. These stains not only look bad but can also lead to permanent discoloration if not treated quickly.
Look for uneven surfaces, gaps between pavers, or any visible cracks. Early detection is key to preventing minor issues from escalating into costly repairs.By being aware of these common paver issues, homeowners can take proactive steps in their paver maintenance routine, ensuring their outdoor spaces remain beautiful and functional for years to come.
Essential Tools and Materials for DIY Paver Maintenance
Maintaining your pavers doesn’t have to break the bank. With the right tools and materials, you can keep your outdoor space looking pristine without hiring professionals. Here’s a list of essential items that will help you perform effective DIY paver maintenance on a budget.- Broom and Dustpan: A simple broom is crucial for sweeping away dirt, leaves, and debris that can accumulate on your pavers.
Regular sweeping prevents stains and keeps your pavers looking fresh.
- Pressure Washer: While this may seem like a larger investment, renting a pressure washer can be cost-effective for deep cleaning. It removes stubborn stains and moss without damaging the pavers.
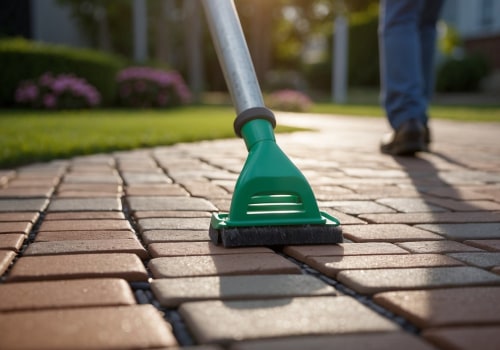
- Stiff-Bristled Brush: For areas that need more attention, a stiff-bristled brush can help scrub away grime and algae. Look for one with a long handle to make the job easier.
- Paver Sealer: Applying a sealer protects your pavers from stains and weather damage. Choose a budget-friendly option that suits your specific type of pavers.
- Joint Sand: Over time, the sand between pavers can wash away.
Replenishing it with polymeric sand not only stabilizes the pavers but also helps prevent weed growth.
- Weed Killer: A homemade solution of vinegar or salt can effectively kill weeds without the need for expensive chemical treatments. This is an eco-friendly option that’s easy on your wallet.
- Garden Hose: A simple garden hose is essential for rinsing off cleaning solutions and debris after maintenance tasks. Consider using a spray nozzle for better control over water flow.
Step-by-Step Guide to Cleaning Pavers
Cleaning your pavers is essential for maintaining their appearance and longevity.Here’s a step-by-step guide to help you clean your pavers effectively without breaking the bank.
1.Gather Your Supplies
- Broom or leaf blower
- Garden hose with a spray nozzle
- Stiff-bristled brush
- Bucket
- Dish soap or a paver-specific cleaner
- White vinegar (for tough stains)
- Sealer (optional, for post-cleaning protection)
2.Remove Debris
Start by using a broom or leaf blower to clear away leaves, dirt, and other debris from the surface of the pavers. This will make the cleaning process more effective.3.Prepare Your Cleaning Solution
In a bucket, mix warm water with a few drops of dish soap. For stubborn stains, consider adding a cup of white vinegar to the solution. This natural cleaner is effective and budget-friendly.4.Scrub the Pavers
Dip your stiff-bristled brush into the cleaning solution and scrub the pavers in circular motions.Pay special attention to stained areas or spots with moss and algae. Rinse frequently to avoid soap buildup.
5.Rinse Thoroughly
Once you’ve scrubbed all areas, use your garden hose to rinse off the cleaning solution completely. Ensure that no residue remains, as this can lead to slippery surfaces.6.Allow to Dry
Let the pavers dry completely before walking on them or applying any sealant. This usually takes a few hours depending on the weather conditions.7.Optional: Apply Sealer
If you want to protect your pavers from future stains and enhance their color, consider applying a sealer once they are dry.Follow the manufacturer’s instructions for best results.By following these simple steps, you can keep your pavers looking great while sticking to your budget. Regular maintenance will not only improve their appearance but also extend their lifespan.
Sealing Pavers: When and How to Do It Yourself
Sealing your pavers is a crucial step in paver maintenance that can significantly extend their lifespan and enhance their appearance. By applying a sealant, you protect the surface from stains, moisture, and the damaging effects of UV rays. But when is the right time to seal your pavers, and how can you do it yourself on a budget? Let's explore.When to Seal Pavers
Timing is essential for effective sealing.Generally, you should consider sealing your pavers:
- After installation: New pavers should be sealed within 30 days to prevent stains and ensure proper adhesion.
- Every 1-3 years: Depending on the type of sealant used and environmental factors, reapplication may be necessary.
- When discoloration occurs: If you notice fading or staining, it’s time to reseal.
The Sealing Process for Pavers
Here’s a step-by-step guide to sealing your pavers yourself:- Clean the Surface: Begin by thoroughly cleaning your pavers. Use a pressure washer or a stiff broom to remove dirt, debris, and any existing sealant. Allow the surface to dry completely.
- Choose the Right Sealant: Opt for a budget-friendly sealant that suits your paver type. Water-based sealants are often less expensive and easier to apply than solvent-based options.
- Apply the Sealant: Using a roller or sprayer, apply an even coat of sealant over the pavers.
Work in small sections to ensure complete coverage. Avoid puddling by spreading excess sealant with a brush.
- Let It Cure: Allow the sealant to cure as per the manufacturer’s instructions, usually 24-48 hours before heavy foot traffic.
Weed Control Strategies for Paved Areas
Maintaining the aesthetic appeal of your paved areas can be challenging, especially when it comes to weed control. Weeds not only detract from the beauty of your pavers but can also cause structural damage over time.Here are some effective and budget-friendly DIY weed removal strategies to keep your paved surfaces looking pristine.
- Boiling Water: One of the simplest methods for weed control for pavers is pouring boiling water directly onto the weeds. This method is effective because the high temperature kills the plants instantly, making it a quick and eco-friendly solution.
- Vinegar Solution: A mixture of vinegar and water can serve as a natural herbicide. Use a spray bottle to apply a solution of 1 part vinegar to 1 part water directly onto the weeds. The acetic acid in vinegar will dry out the plants, effectively eliminating them.
- Salt Application: Salt can be an effective weed killer when used carefully.
Mix salt with water (3:1 ratio) and apply it to the weeds. However, be cautious as salt can also affect surrounding plants and soil health.
- Mulching: To prevent weeds from sprouting in the first place, consider applying a layer of mulch around your paved areas. This not only suppresses weed growth but also enhances the overall appearance of your landscape.
- Regular Maintenance: Regularly inspect your paved areas for any signs of weed growth. Pulling out weeds by hand or using a weeding tool can be effective if done consistently, especially before they have a chance to spread.
This type of sand hardens when wet, creating a barrier that helps prevent weed growth while allowing for proper drainage. By implementing these preventing weeds in paver joints strategies, you can maintain your paved areas without breaking the bank.
Repairing Damaged Pavers: A DIY Approach
Maintaining the integrity of your pavers is essential for both aesthetics and safety. If you notice cracked or shifting pavers, addressing these issues promptly can save you money in the long run. Here are some effective DIY tips for repairing damaged pavers.Repairing Cracked Pavers
If you have cracked pavers, the first step is to clean the area thoroughly.Remove any debris, dirt, or weeds that may have accumulated in the crack. Once clean, you can use a concrete patching compound to fill in the crack. Follow these steps:
- Choose the right patching compound: Look for a product specifically designed for outdoor use and compatible with your paver material.
- Apply the compound: Use a putty knife to press the compound into the crack, ensuring it fills completely.
- Smooth the surface: Level it out with the surrounding paver surface and allow it to cure as per the manufacturer's instructions.
Fixing Shifting Pavers
Shifting pavers can create uneven surfaces that pose tripping hazards. To fix this issue, follow these steps:- Identify the cause: Often, shifting occurs due to inadequate base material or erosion.
Assess the area to determine if additional support is needed.
- Reposition the pavers: Carefully lift the affected pavers and check for any loose sand or gravel beneath. Refill with fresh base material if necessary.
- Compact the base: Use a tamper to compact the base material before replacing the pavers. This will help prevent future shifting.
- Secure with polymeric sand: After repositioning, fill the joints with polymeric sand and mist lightly with water to activate its binding properties.
Maintaining Paver Joints: Importance and Techniques
Maintaining the joints between pavers is crucial for the overall integrity and appearance of your paved surfaces.Paver joint maintenance not only enhances the aesthetic appeal but also prevents weed growth, insect infestations, and erosion, which can compromise the stability of your pavers.One of the primary techniques for maintaining paver joints is to regularly check for any gaps or erosion in the joint sand. Over time, rain and foot traffic can wash away the sand that fills these joints, leading to instability. Here are some effective methods to ensure your paver joints remain intact:
- Regular Inspection: Periodically inspect your paver joints for signs of wear or displacement. Look for areas where the sand has washed away or where weeds are beginning to sprout.
- Filling Joint Sand: If you notice gaps, consider refilling them with polymeric sand.
This type of sand hardens when wet, providing a stable fill that resists erosion and weed growth.
- Weed Control: To maintain joint stability, it’s essential to control weeds. Use a mixture of vinegar and water as a natural herbicide to eliminate unwanted plants without harming your pavers.
- Power Washing: Occasionally, use a power washer to clean the surface of your pavers and remove debris from the joints. Be cautious not to displace too much sand during this process.
- Joint Stabilization: For added stability, consider applying a joint stabilizer sealant after filling the joints with sand. This will help lock the sand in place and prevent it from washing away during heavy rains.
Regular attention to these details not only preserves the beauty of your outdoor spaces but also saves you money on potential repairs in the future.
FAQs About Paver Maintenance on a Budget
Maintaining pavers on a budget can raise several questions. Here are some frequently asked questions that can help you navigate paver maintenance effectively without breaking the bank.What are the most cost-effective ways to clean pavers?
One of the simplest and most affordable methods to clean your pavers is by using a mixture of water and vinegar. This natural solution can help remove stains and dirt without the need for expensive chemical cleaners. Additionally, a pressure washer can be rented at a low cost, making it an economical choice for deep cleaning.How often should I perform maintenance on my pavers?
Regular maintenance is key to prolonging the life of your pavers.Aim to perform basic cleaning every few months, while more thorough maintenance, such as resealing, should be done every 1-3 years depending on wear and tear. Keeping a consistent schedule can help you avoid costly repairs in the long run.
Can I repair damaged pavers myself?
Yes! Many minor repairs can be done without professional help. For instance, if you have loose or cracked pavers, you can often reset them by removing the surrounding sand and re-leveling the base. For cracks, a simple patching compound can be applied to restore their appearance.What are some budget-friendly sealing options?
- DIY sealers: You can purchase sealers at home improvement stores and apply them yourself, saving on labor costs.
- Natural alternatives: Some homeowners use linseed oil as a natural sealer, which can be more affordable than commercial products.
How do I prevent weeds from growing between my pavers?
A simple and cost-effective method to prevent weeds is to use a mixture of sand and salt.Sprinkle this mixture in the joints between your pavers; it will deter weed growth without harming your pavers. Regularly sweeping away debris also helps minimize weed growth.By addressing these common questions, you can maintain your pavers effectively while staying within your budget. Remember that proactive care is always more cost-effective than reactive repairs!
Conclusion: Key Takeaways for Effective Paver Maintenance
In conclusion, maintaining your pavers is essential for preserving their beauty and functionality. Regular paver maintenance not only enhances the aesthetic appeal of your outdoor spaces but also extends the lifespan of your pavers, saving you money in the long run. Here are the key takeaways to keep in mind:- Regular Cleaning: Make it a habit to sweep and wash your pavers periodically.
This prevents dirt and debris from accumulating, which can lead to staining and deterioration.
- Weed Control: Addressing weeds promptly is crucial. Use natural solutions like vinegar or boiling water to eliminate them without harming your pavers.
- Sealing: Consider applying a sealant every few years. This protective layer helps resist stains and moisture, making future cleaning easier.
- Joint Sand Maintenance: Replenishing joint sand is vital for stability. If you notice gaps, refill them with polymeric sand to prevent shifting and weed growth.
- Repairing Damage: Don’t ignore cracks or loose pavers.
Addressing these issues quickly can prevent more extensive damage and costly repairs.